
Hello and Hello Stampers!
Since March is National Craft Month, I’ll be featuring a few “How To” projects for you to learn. These projects will be a chance for you to learn and try something new. Here’s a tutorial on how to make a bow from a fork. You can vary the size of the bow by using a smaller or larger fork. For this bow a dinner fork was used along with the FREE Sale-a-Bration 1/4″ Coastal Cabana Ribbon from the Best Year Ever Accessory Pack. So, let’s get started.
Step 1:
Wrap an 8 inch piece of ribbon around the dinner fork prongs.
Make sure the back piece or tail of the ribbon is longer than the front tail.

Step 2:
Take the back tail and wrap it around the shorter front tail.
Make sure it wraps around to the front.

Step 3:
Next bring the back tail through the middle of the fork.
Bring it through from the bottom front to the back.

Step 4:
Bring the tail around and up through the middle of the fork.
Bring it to the front.

Step 5:
Now just knot the two tails together, pulling tightly as you knot.

Step 6:
Turn the fork., because the front of the bow is on the opposite side of the knot.

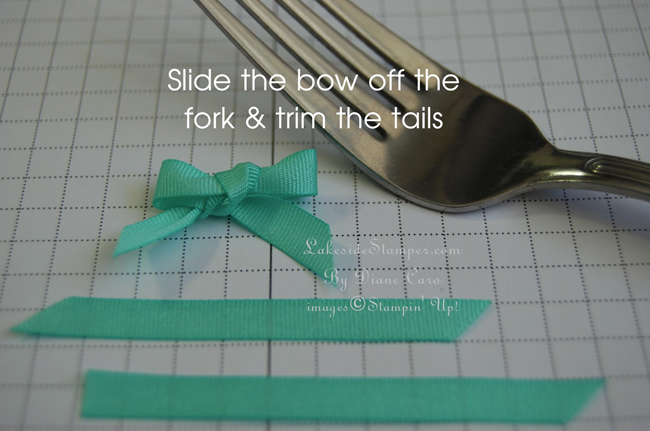
Step 7:
Slide the bow off the fork and trim the tails at a diagonal.
And, that’s how you make a bow from a fork!
Give it a try.
Hugs,
