Once again I’m excited to share this post with you. This is a Mixed Media piece we did at my “Mixed Media Workshop.” The workshop took place in July, but I’m just now getting around to post it. Most everything used for this canvas can be Stampin’ Up! I had detailed photos, but my Grandson got hold of my camera and reformatted all the pictures I had. When I went to up-load them they couldn’t be read by my computer. He’s a genius! haha I know this is a very loooooong blog post, but there’s a lot of information here for you.
These mixed media pieces are a lot of fun to make, because ANYTHING GOES! There’s no right or wrong way of creating them. There are a few things to keep in mind and please note these are general guidelines. Your piece even following these instructions will look completely different. And, that’s the way it should be. After all it’s your work of art and it should reflect you.
The first thing to remember in creating this mixed media canvas piece is to use a variety of inks, paints, rub-ons, stamps and textures. After all that’s what mixed media is. You want lots of layers. There are a few things to keep in mind and please note these are general guidelines. Another thing to remember is to either use Acrylic Spray or Mod Podge between each layer.
Items you’ll need: Stamps: Swallowtail, Papillon Potpourri, Ink Refills, StazOn or Momento Ink Pads, Designer Series Paper, Spritzers, Sponges, 1″ Paint Brush, Gesso, Acrylic Spray or Mod Podge, Stencils or Masks, Computer Generated Art, Decorative Tissues, Ribbon, Rub-Ons and any other Embellishments you that work with your idea
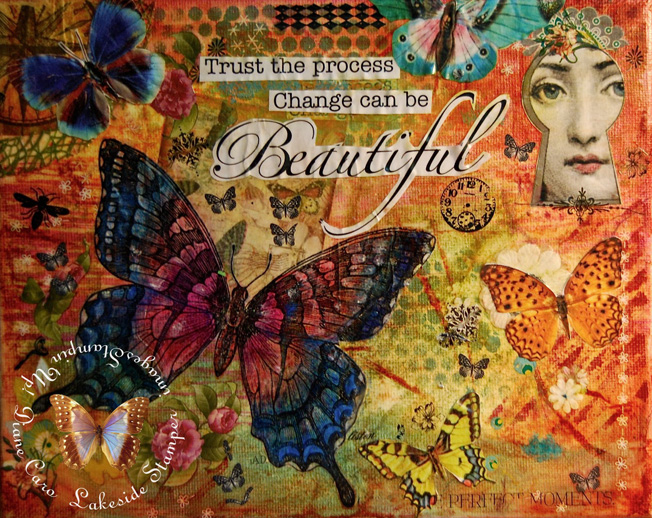
This Beautiful Butterfly canvas was created in the following way:
1. Buy a Pre-Stretched Canvas from your local craft store. They frequent;y run sales on 5 to 10 in a pack. Believe me you’ll want a pack, because you’ll want to make more then just one. That’s only my opinion though.

2. Once you have your canvas You’ll want to brush or sponge on Gesso* or White Acrylic Paint. Either material works well to prepare the canvas. Think of these as a primer that will enable you to use less of all your pretty colors. Let the gesso or paint dry completely.
*Gesso is a white paint mixture consisting of a binder mixed with chalk, gypsum, pigment or any combination of these. It is used in artwork as a preparation on any number of surfaces as a base for paint or other materials that are applied over it.
3. Once the Gesso has dried, give your canvas a light coat of Acrylic Spray. The Acrylic Spray will hold the Gesso in place so it doesn’t pull up when you do your other layers over it.
4. Once the Acrylic Spray has dried the fun really begins. The choice is yours for this layer. You can use any ink refill of choice in a spritzer and just spritz on this layer. You need to be careful that you don’t make gray, by mixing too many colors. I try to go with two or three colors and a white to really pop certain areas. Let the colors dry and if you want more intensity, spritz again.
5. When the last layer is dry, spray another coat of Acrylic Spray over the whole canvas. This will protect this water based layer from pulling up when you work on top layers.

6. Next, take some stencils such as the Stampin’ Up!’s Dots & Stripes or the Hearts & Stars Masks or what I love to use is Punchinella. Punchinella is fun plastic ribbon that is left over after sequins are punched out, often called “sequin waste” or “sequin scrim.” I love to use it as a stencil for creating backgrounds.
7. You can layer on textured fabric, lace ribbon such as Stampin’ Up!’s Venetian Crochet Trim. Mod Podge® can be used on this layer. Mod Podge®, is an all-in-one glue, sealer and finish! Apply the Mod Podge® with a soft brush or sponge.
8. When most of your underlying layers are done move on to the saying or words and the butterfly images. For the saying simply computer generate one of your favorites and print it out on your home computer. Cut it close to the type and adhere it with the Mod Podge®
9. The large butterfly image is the Stampin’ Up! Swallowtail Stamp. Stamp out the butterfly on some white tissue paper in StazOn Ink if you’re using colored pencils. I used StazOn and colored pencils on this piece. Stamp out smaller butterflies on the tissue paper as well. Once colored, roughly cut ou the images. You don’t need to be exact with the cutting, because the edges of the tissue paper will blend into the canvas when you Mod Podge® them down. You can also use magazine pictures. If you want to use the Blenabilities Markers stamp the butterfly in Momento Ink. Here’s the difference in ink types and when to use them:
Memento Ink Pad (132708):_____________________________________________________
The Memento Ink Pad is a dye based ink pad which dries quickly and is perfect for all kinds of paper. The reason Memento Ink dries quickly, like all of Stampin’ Up! classic ink pads, is the ink literally dyes the paper or cardstock. The color gets soaked into the fibers of the paper. The Memento Ink Pad is water based which means it is not waterproof, so you can’t color images with water-colors or other water-based mediums, because the ink will run together. However, since the new Stampin’ Up! Blendabilities are alcohol based it is safe to use Momento Ink with these, because the two different ink types won’t bleed together. Since Memento Ink is water-based clean up can be done using Stampin’ Mist (102394).
Staz-On Ink Pad (101406):_______________________________________________________
Staz-On is a solvent based ink and once dried Staz-On is permanent on almost any surface, including plastic, glass, ceramic, metal, wood and card-stock. Since Staz-On, unlike Memento Ink, does not get soaked up by paper fibers, rather it dries on the surface. Staz-On is a permanent ink; use it to stamp images to watercolor, because the watercolor won’t make the Staz-On bleed. Use the Staz-On with Stampin’ Up! Markers (131264). Clean your stamps with Staz-On Cleaner (109196)
10. Step back and look your canvas over. It’s not too late to add more color, rub-ons or images if needed.
11. Give everything one last good coat of Acrylic Spray or Mod Podge®
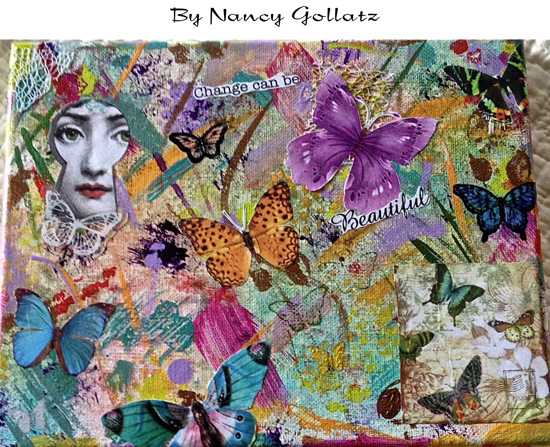
Here are some of the Mixed Media pieces the class made.


For another step by step tutorial with photos of my avian canvas, go to My Avian Mixed Media Project
Thanks for reading to the end. I hope you learned something new. Now it’s your turn. Sit down and see what you can come up with. If you live in the Westchester, Putnam County, New York areas I’ll be offering more classes in Mixed Media. To find out where and when sign up for my newsletter on the sidebar of this blog.
As always hugs,
